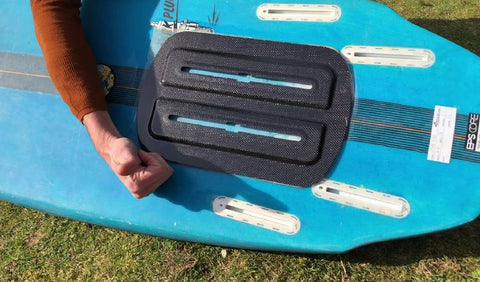
So you have a board that has too much bottom geometry to stick a FoilMount flat. This is common and happens. The good news is that usually there actually isn't that much curve that needs to be filled/modified. The easiest way we have found to accomplish this is to use a self-leveling "pool" method to create a flat area. I call it a skating rink which will make more sense when you see how we do it.
Step 1:
Determine where you want your mount to be installed and do a dry-fit with the FoilMount you plan to install. When you set the FoilMount on there for the dry-fit you will see exactly where you will need to fill or modify to make a flat installation surface. You can even take a picture for reference while you're filling. Before you remove the mount from the area for install, use a pencil to outline the mount. It needs to be said that you should do your very best to make sure that the dry-fit is centered and straight as you will use this outline to create the mounting area.

Step 2:
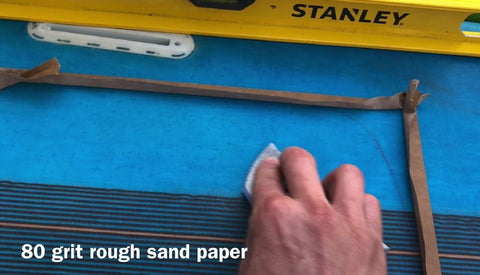
Now we are going to create a levee around the pencil outline that will hold our resin in while it cures. This should be made of painters tape or similar. Make sure you get a good seal on the board so the resin doesn't leak out the bottom of the barrier. I've also seen guys use clay for this. Make the barrier high enough so that it is higher than you will need to fill to make the flat installation barrier. That picture you took of the dryfit comes in handy here or if you can just remember about how high. 
Step 3:
Now we are going to rough up the surface of the board inside the skating rink/levee we made with our tape. Use an 80 grit rough sand paper and small circular movements to get deep cuts into the surface to give something for the cured resin to adhere to when you're installing. Don't get crazy but make sure to get the entire surface. Once you're done use a vacuum or shop air to suck or blow off the surface so there is no dust to get into our resin. 
Step 4:
Next, we are going to you are going to level the entire board. I like to use two saw horses or similar to set the board on. Then, use a level with a floating bubble to make sure the board is level in the forward to aft direction and the side to side direction. Use shims of wood or other to build up the low side until the entire system is level. This is very important because we are going to use gravity to self level our resin and make our installation skating ring flat for install. 

Step 4:
Once we are level we are ready to mix our resin and pour into our skating rink/levee we made with the tape. If you have some deep areas you can use microbeads to thicken the mix and add volume without adding too much weight. The microbead mixture won't flow as well so DON'T use it for the entire pour. Once you've put in your microbead resin (if needed), pour your epoxy resin inside the skating rink. You will need to have a paint brush ready to help the resin overcome the surface tension of the boards surface. This means you will basically need to paint it over the entire surface so the resin can easily flow and self-level. Don't go crazy with the resin, you only want to use the minimum you NEED for a level surface. 
Step 5:
Let the resin cure overnight and do another dryfit to make sure you filled in the gaps sufficently. We will be sanding the surface with a belt or rotary sander so it doesn't have to be totally flat but all of the large gaps need to be filled. If there is still large gap(s) sand with 80 grit and fill them with resin. If not you're ready for the next step. 
Step 6:
Use a belt sander or rotary sander with 220-400 grit to level the surface and get rid of any bubbles etc. This will also make a perfect surface for installing the VHB for the FoilMount. I like to sand then dry-fit and then sand and dry-fit again to check the progress. When the surface looks ready for install, you can peel the levee/skating rink we made with the tape off the board and sand any stubborn places to get the tape/resin edge looking nice. I like to sand them round on the edges. Finally, clean the surface with water and remove all oil and dust before following the FoilMount installation instructions.
You're done, enjoy your new ride!

